I’m currently working on a Christmas present for my new in-laws.
The goal is to be able to remotely monitor the temperature and humidity at another location over the internet. I want to do this at a reasonably low cost, using very little power and not taking up a lot of space in the target location.
To meet these goals, I’ve designed a solution using Dallas/Maxim 1-Wire devices. These are low cost sensors that interface using a very simple parallel bus, wired (with, despite the name, 2-3 wires) over either a standard cat-5 ethernet cable or RJ-11/RJ-12 style cable. I’m going to drive them using a small embedded Linux system for silent and low power operation.
The sensors and adapters arrived a couple of days ago. I had other projects under way, so playing with them had to wait until today. I’m posting the following because the adapter I’m using is relatively little known, meaning that almost everything I could find for software usage examples did not cover this adapter. After several hours, I have now found the secret sauce and I’m going to pass along the recipe to you (and me, in case I forget!).
Here’s the parts I’m using:
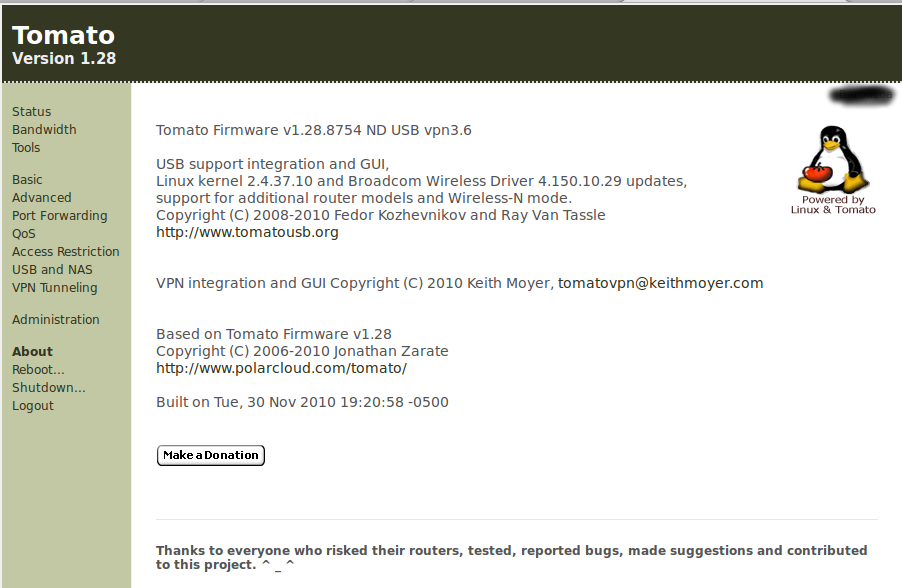
- Linksys NSLU-2 Network Storage Link, hacked to run Unslung 6.8 (a modification of the original embedded Linux provided by Cisco on this unit, which allows running many other SW packages)
- iButtonLink LinkUSB-SD 1-Wire Bus Adapter
- iButtonLink T-Sense-SD Temperature Sensor
- and, eventually, a AAG TAI-8540 humidity sensor
I’d planned to use a DS-9490R adapter, which is very well documented for SW use, but was finding them sold out wherever I looked. Same deal for the TAI-8540 (but we could always add the humidity sensor later). Looking for alternatives so the gift would be available on time got me to iButtonLink. Their LinkUSB series are supposed to be superior performing masters, and they were available.
My first task was to determine and get the required software installed. My original desire was to use the oww (1-Wire Weather) package, which was developed to work with a dedicated hobbyist weather station product that Dallas once had available. It has since expanded to support other standalone sensors and is available in the Unslung ipkg feed, so it can be installed and used without needing to be compiled. It has a bunch of great features, including the ability to upload/push data to a server for viewing, so no firewall and DNS shenanigans would be involved. This all would be great, but I’ve not yet been able to get it to work with the LinkUSB adapter. So searching on… I landed on two other packages: owfs (1-wire file system) and DigiTemp. Again, both of these are available as native ipkg feeds for Unslung (the selection is impressive).
OWFS
I tried owfs first, as there were many on-line comments about DigiTemp being limited to temperature measurement only, and I knew we wanted to do humidity too. I installed the software according to the instructions on the owfs site. Here is what I did, running as root:
ipkg update

ipkg install owfs

ipkg install owshell owcapi
This automatically installed the start-up scripts too, so owfs would be there after a reboot. Unfortunately, the parameters it used were not compatible with this adapter and no sensors showed when viewing the resulting summary page via http://192.168.15.77:3001/ . I also found the output on that web page to be very confusing at first glance and not made plain on their site, so I couldn’t figure out why I wasn’t seeing any sensors and temps. I poked around using lsusb, etc. but couldn’t find the 1-wire file system entries that were supposedly created by this package. After a frustrating period, I punted and moved on to DigiTemp. But I’d be back later… mere SW can’t beat my persistence!
DigiTemp
DigiTemp is a package designed to do just what it sounds like, grab temperatures from digital devices. In this case, 1-Wire sensors. Some people have gone all out with it. We had more modest goals, and it turns out that the humidity sensor I wanted to use is actually supported under DigiTemp with a serial (not USB) adapter. There might be hope yet…
So I install DigiTemp following instructions on the NSLU2-Linux site, but run into the problem with using a non-DS9490-R adapter once more (all examples were for that one). It turns out there is no single actual digitemp command, but rather a different one based on each adapter type, and mine isn’t listed as one of them. Out of frustration, I decide to try all of them. Amazingly, the last one works! I can see devices!
# digitemp_DS9097U -w -s /dev/ttyUSB0

DigiTemp v3.5.0 Copyright 1996-2007 by Brian C. Lane

GNU Public License v2.0 - http://www.digitemp.com

Turning off all DS2409 Couplers

..

Devices on the Main LAN

280097A702000098 : DS18B20 Temperature Sensor

28848BD50200005C : DS18B20 Temperature Sensor
So here’s my commands to install, configure and use DigiTemp with the LinkUSB adapter:
# digitemp_DS9097U -i -c /etc/digitemp.conf -s /dev/ttyUSB0

DigiTemp v3.5.0 Copyright 1996-2007 by Brian C. Lane

GNU Public License v2.0 - http://www.digitemp.com

Turning off all DS2409 Couplers

..

Searching the 1-Wire LAN

280097A702000098 : DS18B20 Temperature Sensor

28848BD50200005C : DS18B20 Temperature Sensor

ROM #0 : 280097A702000098

ROM #1 : 28848BD50200005C

Wrote /etc/digitemp.conf

# digitemp_DS9097U -q -c /etc/digitemp.conf -a

Dec 03 18:55:38 Sensor 0 C: 19.50 F: 67.10

Dec 03 18:55:39 Sensor 1 C: 21.19 F: 70.14
Yay, we see sensors and actual temperatures! It works. Now from this, I get some clues that I think might help with owfs. So back to crack that nut.
OWFS Redux
From the above, I know I have a device that looks like a DS9097U to software, and it appears to be seen on /dev/ttyUSB0. Armed with this, I poke around owfs and force it to use other settings than the default start-up scripts supply. This means killing all owftpd, owhttpd and owfs processes (via ps -ef and kill -9). I then restart them using /dev/ttyUSB0:
owfs -F -d /dev/ttyUSB0 -m /tmp/1wire

owhttpd -F -p 3001 -d /dev/ttyUSB0
etc.
Note: I’d actually installed a second adapter and sensor in-between activities here, so I modified those commands to add the ttyUSB1 as well (you will see those in the output below). And finally I see something in the /tmp/1wire directory!
# ls

28.0097A7020000 28.75BAA7020000 28.848BD5020000 alarm           bus.0           bus.1           settings        simultaneous    statistics      structure       system          uncached
You can then get some data from a sensor by treating it as a normal text file under Linux, e.g.:
# cat 28.75BAA7020000/temperature

      65.525

#
And when I look at the web interface, I can finally browse these devices as well!

Other Magic
There is one other thing I did a couple of times along the way, but I can’t now remember in what exact order I did it for the last time. This may or may not impact the above for you. I got the clue from this oww page. In there is a bunch of info on using the NSLU-2 with oww, which of course includes that more standard adapter but listed other possibilities. From that, I installed the kernel modules that I thought applied to the LinkUSB:
ipkg install kernel-module-usbserial

ipkg install kernel-module-ftdi-sio
.
After doing so, I then had to load those modules:
insmod usbserial

insmod ftdi_sio
(note the underscore instead of dash here, tricky!).
After this, the NSLU-2 reported via dmesg seeing the LinkUSB adapters (which are connected via a USB hub):
hub.c: new USB device 00:01.0-1, assigned address 3

Device descriptor:8 bytes received.

Device descriptor:18 bytes received.

hub.c: USB hub found

hub.c: 4 ports detected

hub.c: new USB device 00:01.0-1.1, assigned address 4

Device descriptor:8 bytes received.

Device descriptor:18 bytes received.

usbserial.c: FTDI FT232BM Compatible converter detected

usbserial.c: FTDI FT232BM Compatible converter now attached to ttyUSB0 (or usb/tts/0 for devfs)

hub.c: new USB device 00:01.0-1.3, assigned address 5

Device descriptor:8 bytes received.

Device descriptor:18 bytes received.

usbserial.c: FTDI FT232BM Compatible converter detected

usbserial.c: FTDI FT232BM Compatible converter now attached to ttyUSB1 (or usb/tts/1 for devfs)

hub.c: new USB device 00:01.0-1.4, assigned address 6
So this was most likely required for DigiTemp (and/or owfs) to see these devices on ttyUSBn. I will verify this later when I have more time to set up the rest of this project, meaning to: collect the sensor output, create pretty information from it and make it available for remote access.
Off to dinner, but more to come!


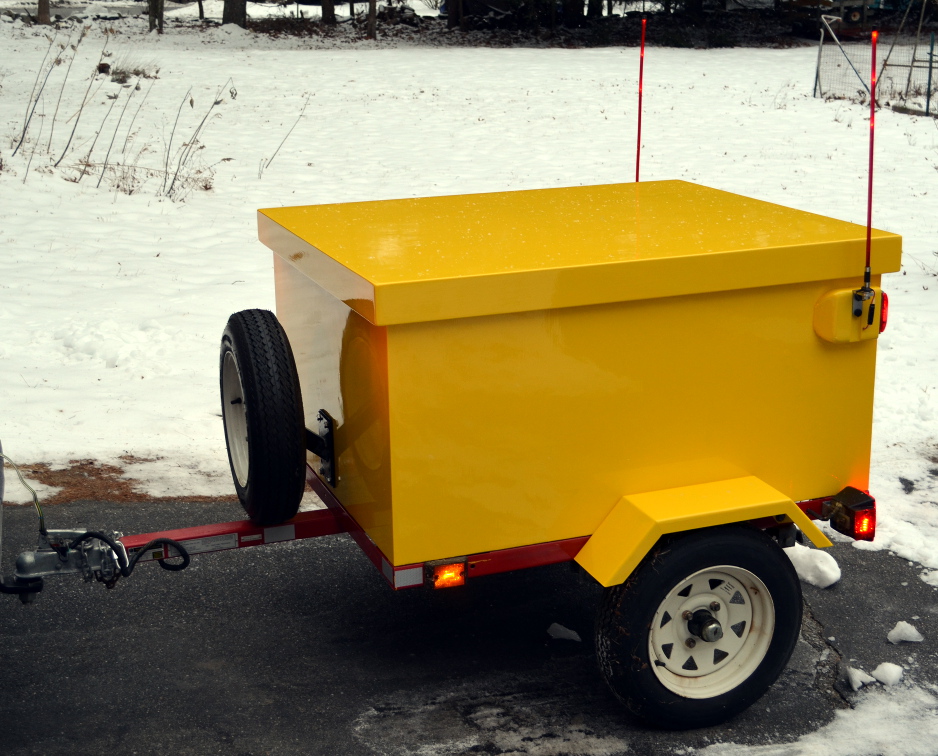 Front View – Note the shiny paint!
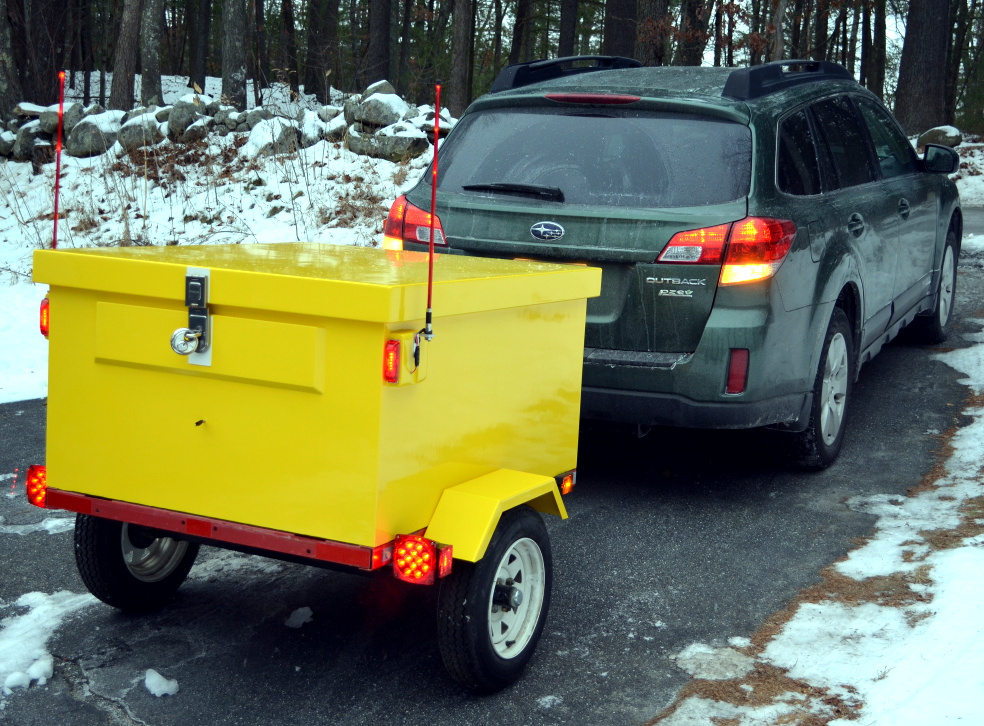 Rear View – Showing changes from the original version including illuminated guide posts and high signal lights
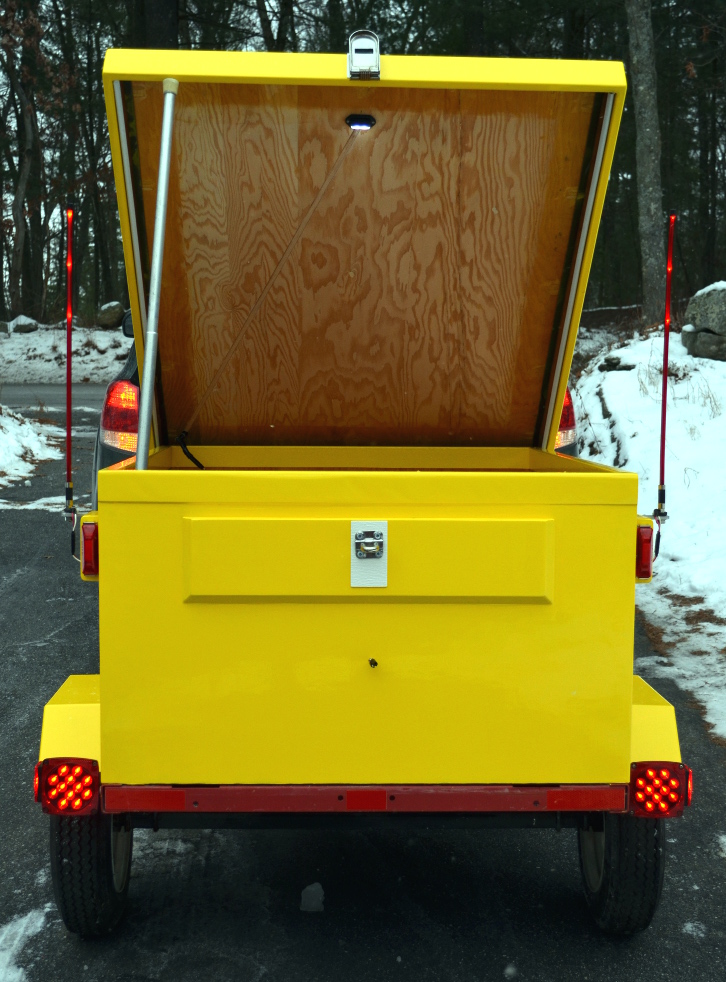 Hatch Lid Open – With revised integral wiring channel for compartment lighting
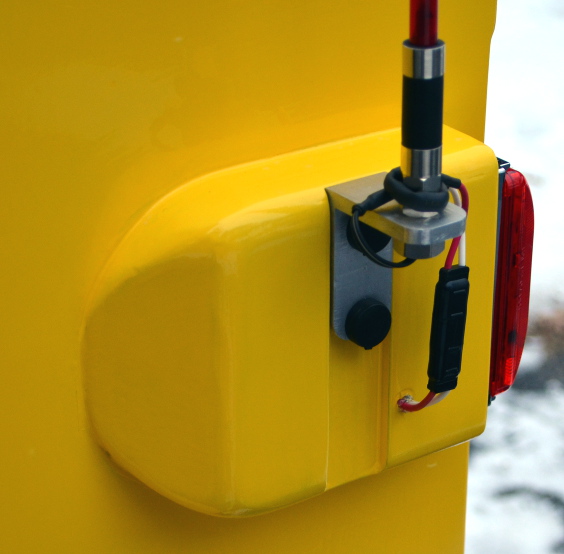 Front View of Added “Ear” – I needed a way to mount the guide lights which would allow them to clear the lid rim
 Rear View of “Ear” – Additional turn/stop signal light and guide light wiring is routed through here into box. Note the quick disconnect to allow removal of the guide posts for storage.
 Driver Side Wiring Channel – Including protective cover for wiring junctions and switch for lid LED light
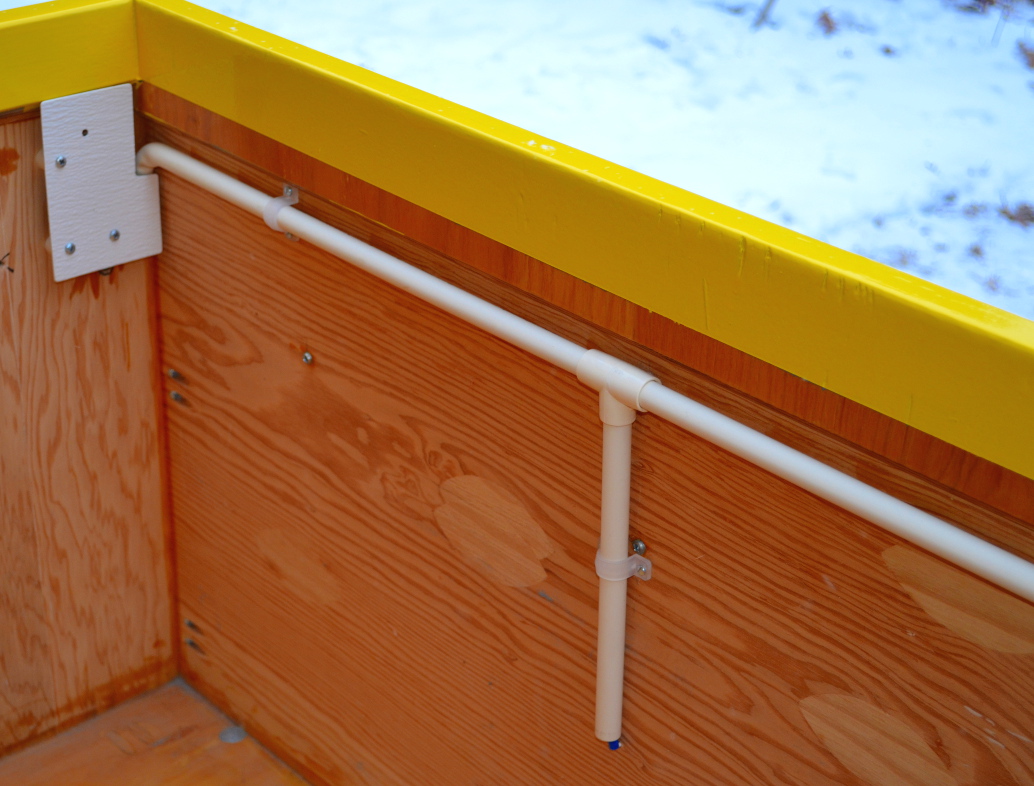 Passenger Side Wiring Channel – All wiring is routed inside dry fitted 1/2″ PVC pipe to protect it from cargo damage